Showing posts with label denim. Show all posts

Monday, February 24, 2014

Slender cut denim pants, velvet black and liver-colored


Looking around on the site of a webshop that sells clothing patterns I saw a pattern from Burda (nr 6933) that attracted me. Nowadays pants are slender cut, so I thought let's give it a try and ordered the pattern.

I had no idea if such pants with narrow legs would suit me, so I made a trial version from a piece of pink denim I still had in stock. 
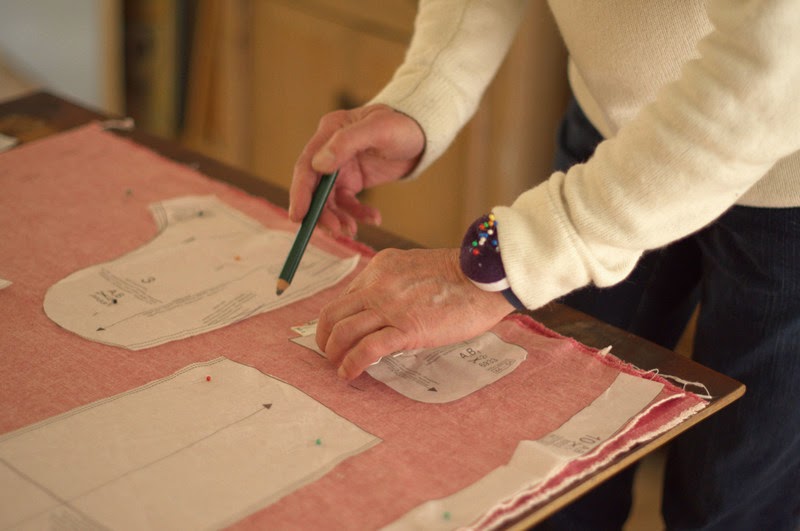


Not that I ever would consider wearing pink pants,  But doing a trial version, you also can try your hand in dyeing the fabric into a more appropriate color, such as velvet black.


As recommended by Burda, I selected the size according to the width at waist level. The pants will closely fit at the hips, but also on the calves, so after comparing the real size of my calves with the size at the pattern,  I added a few millimeters to prevent a skinny effect.

And, since I do not like a zipped fly, I made a button fly.
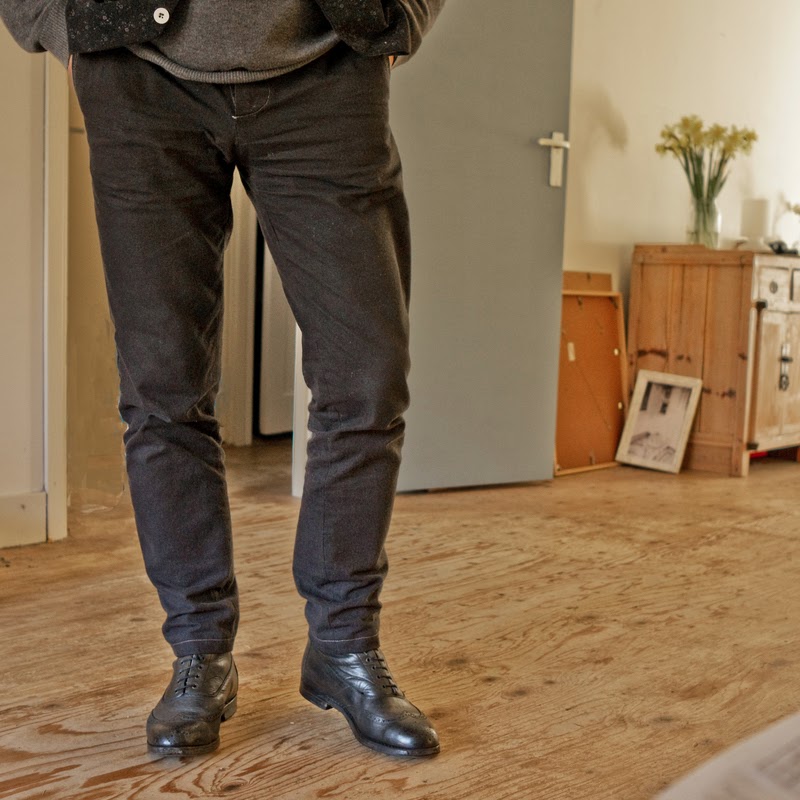

The result was rather satisfactory. Slender cut black velvet denim pants. Slit pockets in the side seams, welt pockets on the back.

Here are some more pics of this model.


Since this was a trial version, I subsequently made a final edition, this one from liver-colored denim.
The sample had told me that the size could be slightly wider, some millimeters in the upper part and the upper legs and almost a centimeter near the hem in the legs.

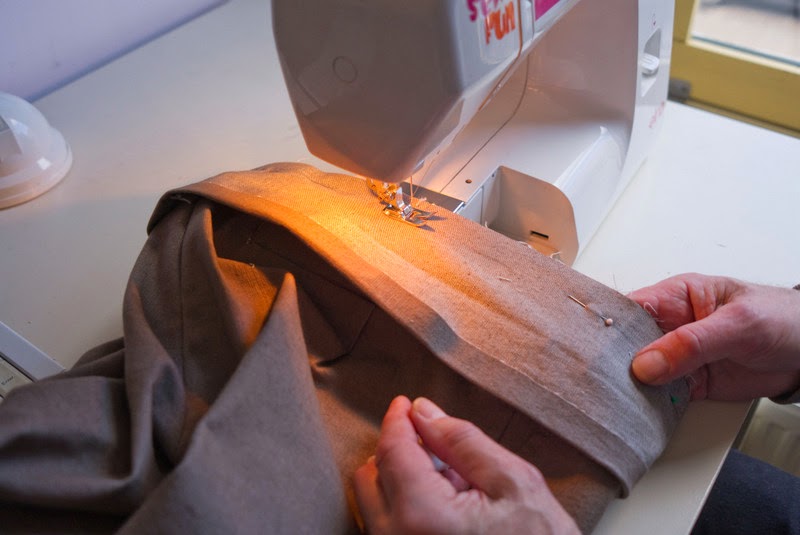
Above picture on the left shows me setting the waistband. (Tip: if you have a fabric with a width of some 140 cm you can at one go cut a strip for the waistband, unless you have a belly size of plus 140 cm. Another tip: press the weft in the fabric before setting the waistband).


Once more: the result was rather satisfactory,


PS 1. In the USA Burda comes as Burdastyle. I do not know if they sell this pattern, but if you enter "Burda 6933" in a search machine you undoubtedly will find webshops that sell this pattern to US customers
PS 2.  If  you are from the USA you may be used to added seam allowances in commercial patterns, please note that Burda patterns have NO seam allowances. 

Wednesday, December 12, 2012

A blue soft denim shirt


Making a walk in the city center, the two of us came along the Boeken fabric store I have written about already. So we popped inside to see if there could be some nice fabric.

I had in mind to make kind of a neat shirt for "decent meetings" or so, but couln't find a fabric that would be in line with such an intention, so it became a blue denim fabric, very soft, very suitable to be processed into a shirt. 


On the mannequin the shirt looks decent enough, and I sure can wear it when taking part in "decent meetings" within my social environment.

While I was busy laying the parts of the pattern on the fabric, I thought it might be a good idea to share some trics I use. For example, to most parts of the shirt I will add a seam allowance of 2 cm (0.9 inch), so -where appropriate- I arrange the parts with an intermediate space of 4 cm (1.8 inch). which makes cutting easier.


Next picture shows what these parts look like when cut: the yoke, two small side parts, the collar and the collar stand..

Using a standard seam allowance makes it easy to sew parts together. The sewing machine has markings on its foot, along which you can let move the fabric, in this way assuring you wil always have the correct width of the seam.


(Because the texture of this denim fabric has the same appearance both horizontally and vertically, I could lay all of these small parts in the same direction. If the texture is different from a horizontal or vertical position, or if the fabric has has a whiff, the yoke, collar and collar stand should be cut in a direction perpendicular to that of the front and back parts of the shirt, or in accordance with the correct direction of the whiff).

Friday, August 26, 2011

A light grey denim jacket


Recently I made dark blue denim pants and I thought it would be nice to combine these with a denim jacket.

Since it's not so easy to find a compatible denim fabric, I was lucky to come along this light grey one.

The jacket I made has the same pattern as the one I presented here about a year ago, made from a shiny leather-looking fabric (from the market in Ridderkerk).

So the two front sides each have four parts, a horizontal top one and three vertical lower ones.with an inside pocket in the seam connecting the upper and the lower parts.
 

The same goes for the backside, in a different arrangement of course and obviously without pockets in the horizontal seam.

The photo's depicting my new jacket have been made with a special lens, through which a soft focus effect is achieved. Quite different, eh?


This jacket has an invisible special feature: inside pockets.

I made them from a strip of fabric which is fixed by stitching it together with the seam of the placket, the seam of the belt and the side seam, dividing the whole into two parts by topstitching through one of the vertical seams.

This provides a lot of room to store stuff, which you should not do of course, unless you want to spoil the model.

Saturday, August 13, 2011

Dark blue denim pants (the buttons)


In an earlier post of february 2011 I complained that I had problems in coming along a nice blue denim fabric. So I was rather happy when strolling the friday market of Amstelveen, a city adjacent to Amsterdam, I came along a seller who had a small quantity of dark blue denim in stock.

I made a pair of jeans from this fabric, using the pattern I have described before, so I will not elaborate on this here.


Here I just would like to show the nice buttons I applied to this sewing.

For the fly I used jeans buttons with kind of a rose centerpiece, items that are not visible from the outside, however, so it's only me who knows about them (and those few people who happen to read this, of course)
 

And for the backside pockets I had some very nice shining jeans buttons, which certainly can be noticed by people around, if they would care to be interested in taking notice of such items, quod non, generally speaking.


Maybe this is just the appropriate moment to make a referral to a colleague blogger from New York, who writes about sewing men's wear and who wrote kind of tutorial how to sew a pair of jeans. The blog is called Male Pattern Boldness and the series starts at May 2, 2011. Take a look.

Tuesday, February 15, 2011

Light blue denim shirt


I have been looking around for a nice light blue denim to make a pair of jeans, but as I wrote earlier, the big jeans manufacturing companies probably have kind of a monopoly on the fabrics. No denim for pants to my liking to be traced in shops or on markets.

However, my partner came home with two meters of a softer kind of light blue denim, just fine to be processed into a shirt.

Above is what I made last week.. The model has small side parts on front and back parts, like in next picture. The folds are there because the side parts will provide a better fitting.


As the picture also demonstrates, the placket shows the selvedge of the fabric (if that is the correct expression for the fraying edge of the fabric). I also used this effect for the edge of the pocket.

Don'tt know if ultimately I will stay with this gadget, but so far it was fun to do.


Above picture shows how the shirt looks like with the collar fixed, but still without buttons. 

To fix the button holes I use a small device that can be installed on the machine, which makes it easy to indicate the right size of the button hole, in this case two cm


This kind of soft denim is a very nice fabric to work with.  Now I do hope one day I come along a produce that will be suitable for jeans.


Tuesday, February 1, 2011

A pair of trousers for next spring


Recently I made that flowery shirt for next spring and I considered I would have to make light blue denim pants, to have a nice combination with this shirt.

I went shopping on my favourite Dappermarkt, but I couldn't find any denim.
So I came home with another light blue fabric, which would be nice to combine with the shirt. (By the way, I had to pay four euro for two meters of the fabric, can you believe this? The buttons are more expensive than the fabric...)


This time I wanted to make a jeans type model.
 

In terms of fabric, jeans are made from denim.

In terms of design, the main features of a jeans model are 1) the typical front pockets and 2) the typical two separate parts topping the rear legs.  Both elements are shown in above picture.

Well, maybe the rivets and the buttons which were functional and not decorative when jeans originally were introduced as workman clothes, form another characteristic.
 

But all other elements (the "fifth pocket", all kind of colored stichtings, wide legs, small legs)  in my opinion are decoration, fantasy, fashion, whatever.

I learned about a London designer who recently presented male fashion with very wide legs, say  five times the usual size. But I also understand skinny legs will be hot next season.

Variations on the same theme.


I will stick to my basic model with legs which are not too wide, not too skinny. And I just will have some variations by decorative topstitching with yarn in a different color.
 

The next picture shows what the trousers look like when completed with silvery (jeans) buttons and a belt that goes very fine with the decorative stichtings..


Of course I still am looking around for my light blue denim fabric.

However, it is not so easy to find it, even in the best fabric shops in town, as if the leading jeans manufacturers monopolize the really nice denim fabrics.

Friday, August 20, 2010

Gilets in black


Gilets are easy to manufacture. Once you have a nice looking pattern, that produces well fitting clothes, the only thing you have to do is to select some fabrics that will do to back up your personality (and cut and stitch carefully and in the right order, of course).


I manufactured some gilets in black. Above is one I made from a remainder of a striped black denim I used for a pair of jeans.  


The pockets are what in french are called poches passepoilées, in english probably welt pockets, in dutch paspelzakken.


The backside is a simple gray corduroy.


Here is another black gilet I made. The front is a very fine waled corduroy fabric with small motives. I came along this one in a local shop with supplies for knitting and sewing in the community of Dieren, where they had a number of these very thin corduroy fabrics.


The backside has been made of a simple grey, sofly striped cotton fabric.


The pockets once more are welt pockets, this time with flaps. And the buttons were recycled from a garment, one time bought in an  "America Today" shop.


And here is a gilet made from a more wide wale black corduroy fabric, front and back manufactured with the same material.


This is one of the first gilets I made. The pattern is a bit different from the other two, and I prefer the pattern of these two, because of a better fitting and look.