Friday, June 20, 2014

A light blue vintage cotton shirt


Recently my partner and I visited a large barrack in the north of Amsterdam, where they sell second hand furniture and other objects from former times, collected in the Eastern European countryside.

We wanted to renew our garden seat with some stuff from the past...


We found what we were looking for, and surprise, there also was a supply of fabrics on roll for sale.

So we came home with a vintage garden table, vintage garden chairs and a roll of light blue vintage cotton, that was lost among all furniture.


The fabric has inwoven stripes, as can be seen on the first picture, which also shows one of the sleeves  under construction, the sleeve split just having been fixed.


Indeed, this fabric was rather suitable to transform into a shirt.

Once more I used the pattern with which I am familiar (for example as in this post), but I thought that for a change it would be fine to fit the collar with somewhat smaller ends.....


That wasn't figured wrong.

As we all know, it is not so easy to vary with men's clothing. It comes to small changes.


And occasionaly a different colored wristband is also quite something....

Monday, February 24, 2014

Slender cut denim pants, velvet black and liver-colored


Looking around on the site of a webshop that sells clothing patterns I saw a pattern from Burda (nr 6933) that attracted me. Nowadays pants are slender cut, so I thought let's give it a try and ordered the pattern.

I had no idea if such pants with narrow legs would suit me, so I made a trial version from a piece of pink denim I still had in stock. 


Not that I ever would consider wearing pink pants,  But doing a trial version, you also can try your hand in dyeing the fabric into a more appropriate color, such as velvet black.


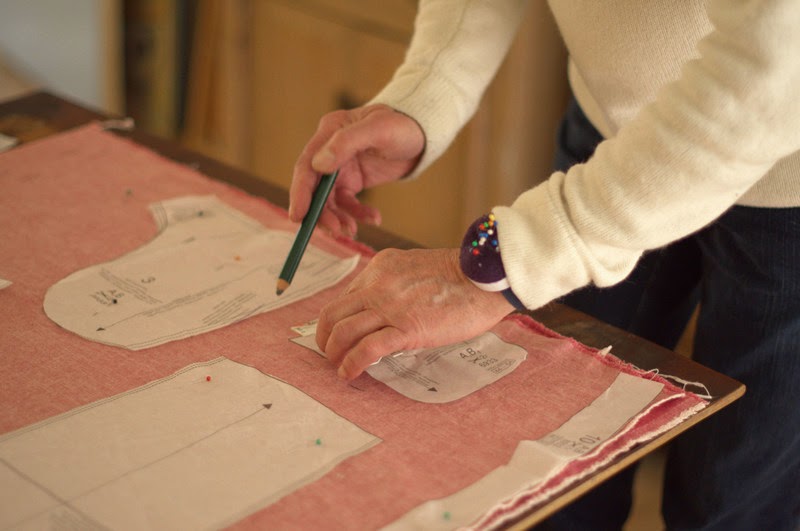
As recommended by Burda, I selected the size according to the width at waist level. The pants will closely fit at the hips, but also on the calves, so after comparing the real size of my calves with the size at the pattern,  I added a few millimeters to prevent a skinny effect.

And, since I do not like a zipped fly, I made a button fly.


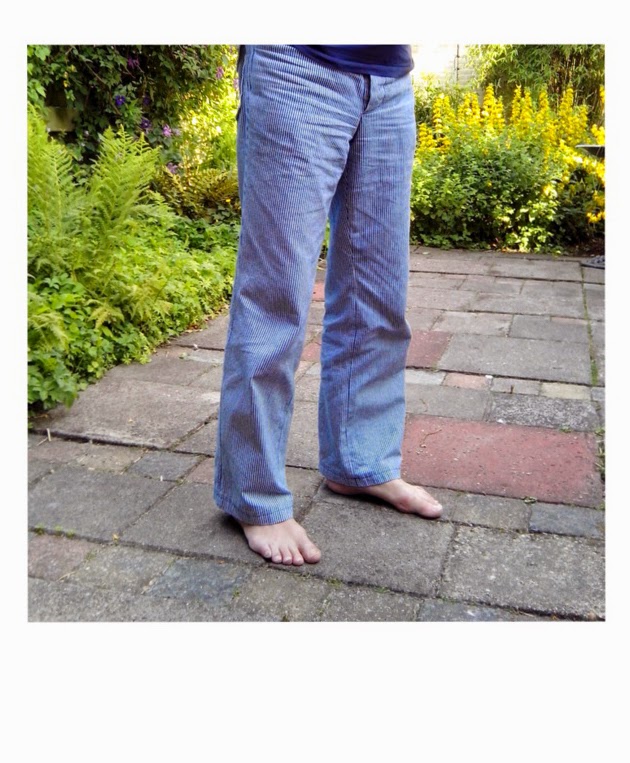
The result was rather satisfactory. Slender cut black velvet denim pants. Slit pockets in the side seams, welt pockets on the back.

Here are some more pics of this model.


Since this was a trial version, I subsequently made a final edition, this one from liver-colored denim.

The sample had told me that the size could be slightly wider, some millimeters in the upper part and the upper legs and almost a centimeter near the hem in the legs.

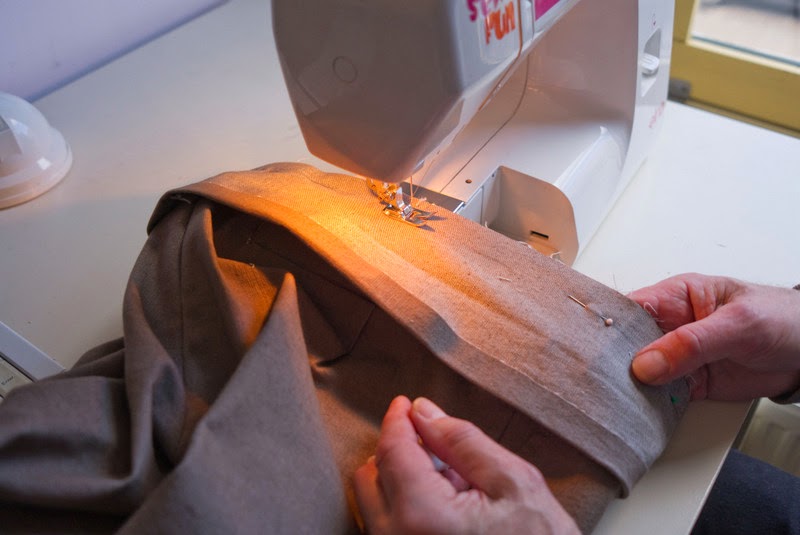
Above picture on the left shows me setting the waistband. (Tip: if you have a fabric with a width of some 140 cm you can at one go cut a strip for the waistband, unless you have a belly size of plus 140 cm. Another tip: press the weft in the fabric before setting the waistband).


Once more: the result was rather satisfactory,


PS 1. In the USA Burda comes as Burdastyle. I do not know if they sell this pattern, but if you enter "Burda 6933" in a search machine you undoubtedly will find webshops that sell this pattern to US customers
PS 2.  If  you are from the USA you may be used to added seam allowances in commercial patterns, please note that Burda patterns have NO seam allowances. 

Thursday, October 10, 2013

A grey blue cotton shirt


Autumn is coming, so I have been looking around for a fabric that would be suited to make a new shirt for that season. 

Late august we happened to be in Elburg, from old a small fortified town facing what once was an inner sea in the Netherlands. Nowadays closed from the world seas by a large dike, this sea has become a lake (of which large parts meanwhile have been reclaimed in order to obtain agricultural area).

And Elburg has become a touristic spot, with a lot of terraces and shops.

aerial view of Elburg showing the typical lay out of a former fortified town

Strolling Elburg, we saw a shop named Hartenwens (Heart´s desire), which specializes in needle work, but also had a small collection of fabrics.

A gray blue cotton fabric looked very fine to transform it into a shirt for the autumn season, and indeed, once manufactured, the shirt turned out to be a rather comfortable dress. 

The pattern of the shirt is the one I so far always have used. Guess it's time to find a new pattern, preferably one that is a bit stylish.

The shirt has dark blue buttons, somewhatt transparent and shiny, bought in the Knopenwinkel (Button shop) along one of the canals in the centre of Amsterdam


The tips & trics section of this post is about setting the collar of a shirt. In a former post I said that setting a collar doesn't just happen and can raise problems. 

Setting a collar

Most sewing instructions say you should attach the front- and backparts of the collar stand to the collar, next sew the backside collarstand to the backside neck opening, then fold inward the seam allowance of the front collarstand, and finish by throughstitching this fold along the seam of the backside collarstand (if you can follow me.....)

It can be done in this way, but I always have problems in neatly fixing the left and right curves of the collar stand and connecting these curves correctly to the folded front parts of the shirt.


So I tried another way of working, by first fixing the backside collar stand to the neckline, using the centre of the collar stand and the center of the neckline as marking points. 

This way of working makes it possible to match the starting points of the left and right curvelines with the folded sides of the left and right front parts of the shirt. In case there is some deviation, it is easy to adjust this, either by adjusting the curvelines, or by adjusting the folds of the frontparts.


Once I am satisfied that the curvelines of the backside collarstand match with the folds of the front parts, I connect the inside collarstand (which already has been stitched to the collar)  to the backside collarstand, good sides facing each other, followed by the usual routine (folding inward the seam allowance of the front collarstand, and finishing by throughstitching this fold).  

Wow, a lot of text for a rather minor issue.... 

Monday, July 15, 2013

Trousers from a cotton fabric with very small blue stripes


Summertime, and the livin' is easy..... Our small city garden has a lot of flowers. The pictures suggest we only have yellow blossoming ones, yellow loosestrife to be exact, but we also have a lot of red and pink roses, nasturtium (indian cress) in various colors, and this year, suddenly, a lot of ferns.

Just before summer finally began this year, I made some new summer wear. My newest production is a pair of trousers, made from a cotton fabric with very small blue stripes, so small that on the pictures the pants seem to be light blue. 


This fabric was available in a fabric store we discovered when scouting the old centre of the small community of Breukelen, south of Amsterdam.

Located in a small street, the shop "De strekkende meter" (something like "the stretching meter"....) offers a nice selection of various fine fabrics and accessory supplies for people who like to sew there own clothes.

These pants have been cut as a jeans model, two front pockets, no money pocket, two back pockets with flaps, jeans buttons.

Guess I looked around enough in the garden, better go inside now, to do some cooking for tonight's dinner on the terrace. 
The pictures in this post have been printed in a format such as years ago pictures came out of a Polaroid camera. A bit of nostalgia..... 

Tuesday, June 18, 2013

Khaki trousers


Above picture, taken early june during an outing, shows me, for the first time wearing my new khaki trousers.

I very much like this picture, made by my partner, beacuse it has a special atmosphere, part is in focus and part is vague, and this has not been done by using photoshop. Wow !


The trousers have been made from a khaki cotton fabric, on sale on a nearby market at a very reduced price. It's a jeans model, five pockets, rivets added..


The seam at the outside part of the legs has got a special treat: one of the seam allowances of some 2 cm (0.8 inches) has been cut off in the lenght, the other part is folded double in the length and is tucked such that it covers the flipped part. 

Use your iron ! And use pins on the good side of the fabric to keep the folded seam allowance in place.


From the good side of the fabric the folded seam allowance is top stitched along the width of the presser foot of the sewing machine. 

You can use yarn with a contrasting color, if you like so, and you can also make a double stitching by repeating the process, having set the needle a little off center, a device most sewing machines will offer.

Take care that topstitching is done on the side of the rear legs of the trousers, unless you want to topstitch through your front pockets


Saturday, February 23, 2013

Petrol blue pants


It's winter time, so on the market they will offer fabrics for warm clothes. My favourite seller had a collection of fabrics especially meant to make trousers, two euro's a meter.


I bought two meters of a petrol colored heavy cotton fabric. Indeed,  had to pay four euro's....

Not bad for a pair of trousers in this time of economic crisis.


The model I made has pockets in the side seams, and I opted for a very simple version, no gadgets, no extra's,...

The blue buttons I still had in stock.


Just had to buy a bobbin of yarn in a matching color.

And here is how these pants looks when worn on a day in spring when visiting the beach. 


Monday, January 14, 2013

A dark blue checkered shirt


The lady selling fabrics at the market, said that a dark blue checkered fabric, that looked fine to process into a garment, had worsted wool in it. Worsted wool,.... sounds fine....


Maybe suitable to make trousers ?

Once at home, and discussing this with friends, rather soon it could be concluded the material would be too thin for pants. Making a shirt would be a much better option. So a shirt it would be.


While at work, my partner made some pictures of me working on construction, above and below probably when I just had combined front and back parts and had to press the outfit in so far as finished.

Lots of pressing is the key to successful do it yourself tailoring.


On the picture below I am doing something with the collar, but, really, I have no idea what....

The image shows no overwrought situation, so obviously there was no problem to rectify


And you know, when doing collars, problems can easily arise. Setting a collar in a shirt does not just happen.


For now, let's present the shirt as finally ready


I must say: a shirt processed with worsted wool, is very nice to wear in wintertime.